Reading pens have been becoming more popular, especially considering their ability to scan text and store it in a digital format. The device has made working with printed materials much easier, eliminating the need to type what has been scanned. But once you’ve scanned your text, arises a logical question how to access your scans on Mac. And it’s what we’re going to talk about here. We’ll go over what these devices are and how to connect the pen and transfer your scans to your Mac without any hassle.
What is a reading pen and how it is used
The reading pen is a device that functions like a scanner. Most pens are similar in size to a regular marker, allowing one to carry them around without any problems. They all differ in terms of features; however, the main use cases are the following:
- Scanning notes and educational materials;
- Working with printed documents;
- Quickly converting text to digital format;
- Reading assistance (reading pen for dyslexia)
One of the most popular devices is IRISPen, a reading pen that is actively used for scanning text and assisting with reading. In this article, we’ll look at how these devices work on Mac using IRISPen Air 8 as an example.
Where scans are stored, and how to access them
After scanning, files are saved to the reading pen’s internal memory. To continue working with them on a Mac, you need to access this data. In most cases, the device can be connected via USB, after which it is recognized as an external drive. This is where the saved scans are stored.
However, macOS users often face limitations when connecting such devices, so the standard method may not be sufficient. Without a convenient file transfer method, even the most advanced reading pen loses some of its functionality.
How to access and upload files to a Mac
To ensure stable access to your files, you can use MacDroid – a tool designed to work with MTP devices on macOS. With its help, the reading pen is mounted similarly to an external drive, allowing you to browse its internal storage and transfer files without limitations from the macOS side.
Once connected, you can access the folders where scans are stored, such as:
- Dys TTS – text-to-speech related files
- Music – audio files
- Picture – images
- Scan text and save – scanned text files
This makes it easier to locate and manage different types of scanned content.
It’s also worth noting that in their official guide, IRISPen mentions MacDroid as one of the solutions for accessing files on macOS.
How to connect IRISPen Air 8 via MacDroid
1. Download and install MacDroid on your Mac.
2. Connect the pen to your Mac via USB.
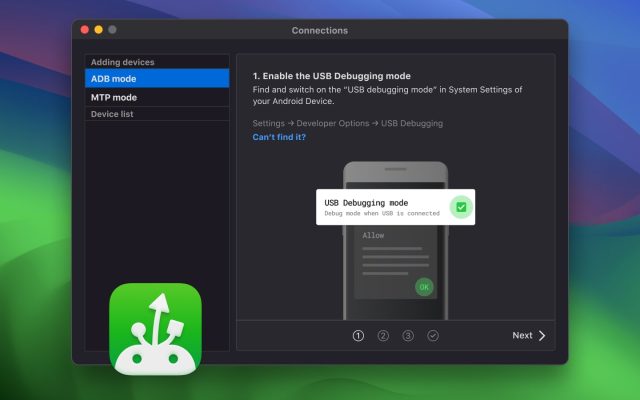
3. Launch MacDroid and select “Connect via MTP”.
4. Wait until your device appears in the Device list.
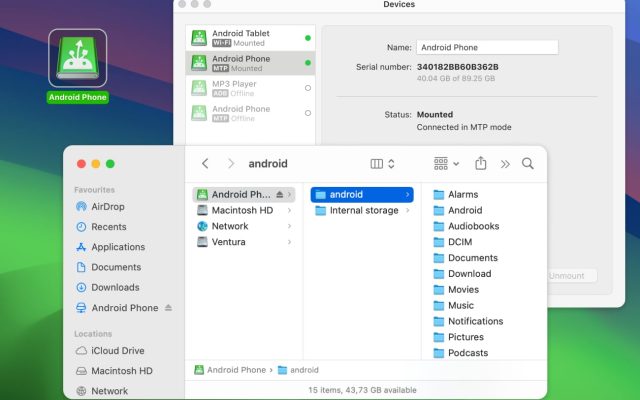
5. Launch Finder and find your reading pen in the sidebar. It will appear as an external disk on your Mac.
6. Click it and navigate to the internal storage of the pen and transfer the necessary files.
Conclusion
A reading pen is a great helper for students, professionals, and those suffering from dyslexia, as it helps them effectively and efficiently scan text and use printed materials. However, to unlock its full potential, it’s important not only to scan text but also to effectively connect the device and access your scans on Mac. And this has been made possible through MacDroid, a fast and efficient tool for transferring files from your reading pen device to Mac.