Cookie
Electronic Team, Inc. uses cookies to personalize your experience on our website. By continuing to use this site, you agree to our cookie policy. Click here to learn more.
MacDroid short-guide series

How to transfer photos from Android to Android easily

Buying a new smartphone is always an exciting event, but it often comes with the question of what will happen to our data, including photos, as they are among the most valuable files on a phone. However, with the help of modern technology, the question of how to transfer photos from Android to Android has become easier than ever.


If I get a new phone will I lose my photos

Getting a new smartphone doesn’t mean losing your photos. If you take care of your data in advance, transferring your photos will be a simple and painless process. With cloud services, data transfer apps, and other methods, you can easily transfer pictures from one phone to another without losing any important ones. In this article, we will tell you in detail about the most popular and accessible methods that will help you transfer data to new phone as well as save all your important photos.

Try MacDroid file transfer app
Free 7-day trial

Transfer photos from Android to Android with Google Photos

One of the easiest and most convenient ways to transfer photos from one Android to another Android device is to use Google Photos. This service has an "Auto-sync" feature, thanks to which all your photos and even videos will be automatically uploaded to the service, allowing you to access them on any device where Google Photos is installed. Plus, it allows you to not only store images but also conveniently sort them, create albums, and even use tools to improve the quality of your pictures.

Here’s how to use it to get your content from one Android smartphone to another:


Google Photos can be used not only for transferring photos, but also for storing files.

1
Install Google Photos from the Play Store in case you don’t have it on your phone already.
2
Open the app on the old device and sign in with your Google account.
3
Tap your profile picture (top right corner). Select Photos settings -> Backup.
4

Here you can:

  • ● choose backup quality;
  • ● configure mobile data usage;
  • ● select which folders to back up.
5
Once you’ve configured your settings, you need to enable the “Backup” option. Wait for the sync between the phone’s gallery and Google Photos to complete on the old phone.
6
Open Google Photos on your new Android smartphone, sign in with the same Google account, and you will be able to access all your photos from your old phone.
7
Repeat steps 3-4 to enable the “Backup” option on your new device and to automatically upload new photos to the service.

How to transfer photos from Android to Android via Bluetooth

One more way that allows you to send photos from Android to another phone is via Bluetooth. This method doesn’t require the Internet connection or installing any additional software and is suitable for those who do not want to use cloud services or cables. However, there are some drawbacks. Bluetooth is not the fastest way to transfer data, and its transfer speed is limited. So if you need to transfer a few photos, you can totally rely on it.

Steps to transfer photos via Bluetooth:


A convenient way, because Bluetooth is on every device.

1
Turn on Bluetooth on both of the Android smartphones. For this, go to Settings -> Bluetooth and toggle Bluetooth on. If necessary, pair the devices.
2
Open your Gallery and select the photos you want to share via Bluetooth.
3
Once the selection is complete, tap on "Share" and select Bluetooth from the list of available file transfer methods.
4
Choose the device you want to transfer the files to. A message that displays "Sending # Files to [device]" appears on the screen.
5
A file transfer notification will appear on the receiving device. Note: This window may disappear (nothing will be transferred) if no action is taken within 15 seconds. If this happens, send the files again.
6
Select “Accept” on the receiving device to download the files.

Note: To correctly transfer data from Android to Android, it is better to place the devices close to each other and, if possible, do not use them at this moment.


How to transfer gallery from Android to Android via Quick Share

Quick Share is a built-in feature of Android and Windows designed to quickly transfer files between devices without using the Internet. The technology allows you to share photos, videos, documents, and other files with nearby devices using Bluetooth and Wi-Fi Direct. Until January 2024, this feature was known as Nearby Share, but now it has a single name - Quick Share.

Follow the steps below to learn how to transfer photos from one Android to another via Quick Share:


Transfer photos from one Android to another via Quick Share

1
Go to Settings -> Connected devices -> Quick Share.
2
Set device visibility to Everyone, Your devices (only signed into your Gmail account), or Contacts only.
3
Open Gallery and select the files you want to send.
4
Tap Share and choose the Quick Share option.
5
Choose the receiving device from the list.
6
On the receiving device, you’ll get a notification. Tap Accept, and the file will be saved automatically.

Note: Make sure to enable Bluetooth and Wi-Fi on both devices.


Transfer photos from Android to Android via computer

Another effective way to transfer data to new phone is to use a computer. This method is convenient if you have a lot of photos that you need to transfer to your new smartphone quickly and securely. As lots of users are divided into two groups: those who use Mac and those who use Windows, we thought it would be fair to include apps for each of them.


Transfer photos from Android to Android using MacDroid for Mac

MacDroid

4.5 Rank based on 958 + users Reviews (958)
Requirements: macOS 10.15 , 20.48MB free space. Version 2.4.602 ( 27 Mar, 2025 )
Category: DeveloperApplication

Let's take a look at the scenario where you are using a MacBook and need to perform an “Android phone connect to Mac”. It’s no secret that it is not as easy to connect Android to Mac as it is on Windows, but it is still possible. Here is where MacDroid comes to rescue. It is a handy macOS app that is designed to bridge the gap between these two OSes. With its help, you can easily transfer photos from your smartphone to your MacBook and vice versa. The app supports different Android smartphone models as well as MTP-compatible devices.

MacDroid supports both wired and wireless connections, giving you the flexibility to choose the transfer method. Once installed, the app easily mounts your phone in Finder, giving you full access to your phone's internal memory and SD card. This is a convenient solution for users who want to transfer photos from one Android to another after saving them to their computer. In addition to photos, MacDroid supports the transfer of videos, music, and other data.


Let's look at MacDroid's pros&cons.

Proceed with the steps below to learn how it works:
1 blank
Download and install MacDroid on your Mac.
2 blank
Launch the app and select the Wi-Fi mode by clicking the “Connect via Wi-Fi” button.
3 blank

Activate the Developer options and enable the USB debugging mode on your phone by following the onscreen instructions.

4 blank
On our Mac, click the “Android 11+” button.
5 blank
On your phone, go to Settings - > Developer options and enable Wireless debugging.
6 blank

Open the “Wireless debugging” setting and tap the “Pair device with QR code” option. Alternatively, you can use the pairing code option or use manual pairing.


Pair device with QR code

7 blank
Point the camera at the screen of your MacBook, where the QR code is displayed. Wait for the phone to be connected to your Mac.
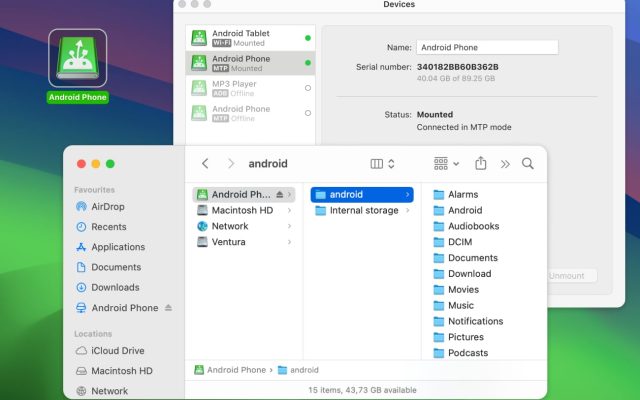
8 blank
Once connected, you can transfer photos from your phone to a Mac by simply dragging and dropping the files.

Note: Ensure both your devices are connected to the same Wi-Fi network.


If your phone is running an Android version up to 10, check out our guide to know the steps of connection.


Try MacDroid for efficient file transfer
Android USB file transfer

Transfer pictures from Android to Android via Quick Share for Windows

We have already talked about Quick Share as a way of transferring files between Android smartphones. But now it is worth paying attention to its version for Windows. Like MacDroid, this app makes it easy to manage photos between Android and PC and use your computer as an intermediate link to transfer data between phones. Quick Share supports transferring not only photos but also videos, documents, and other files, providing a convenient integration between Windows and Android.

Follow this guide to learn how it works:


Quick Share for Windows

1
Download and install Quick Share on your computer.
2
Launch the app and sign in to your Google account.
3
Adjust device visibility settings to choose who can share files with you (everyone, only friends and family, or only your own devices).
4
On your Android smartphone, select the files you want to transfer. Tap the share button and choose Quick Share.
5
Your Windows computer should appear in the list of available devices. Select it.
6
On your Windows computer, confirm the transfer by clicking the “Accept” button.
7
Wait for the files to be transferred.

Note: Make sure Bluetooth and Wi-Fi are turned on on both devices.


Try MacDroid Android file manager Mac
Android files transfer to Mac

Conclusion

Transferring photos from one Android phone to another can be a quick and easy process if you choose the right method. Whether you prefer to use the cloud, Bluetooth, a computer, or dedicated apps like MacDroid, Quick Share, etc., you have several options to ensure that all your photos stay with you on your new smartphone. Choose the method that suits your convenience and data size, and don't worry about losing important photos!

MacDroid

Break transfer barrier between Android and Mac

Requires macOS 10.15 or newer; compatible with all Android and MTP devices
Transfer files between Android and Mac using MacDroid.